The Workshop: Apache and PHP – Back to Basics - php[architect] Magazine January 2022
Joe • May 13, 2022
learning phparch writing php apacheWarning:
This post content may not be current, please double check the official documentation as needed.
This post may also be in an unedited form with grammatical or spelling mistakes, purchase the January 2022 issue from http://phparch.com for the professionally edited version.
Apache and PHP - Back to Basics
This month we’re diving into Apache and PHP configuration to better understand the relationship between the web (HTTP) server and our application. When getting started with PHP it’s quite common for tutorials and guides to skip over the webserver and focus more on the language aspects. PHP developers need to have a strong understanding of how the webserver executes their code as requests and responses handled by a server are the primary purpose of web applications. We’re going to install Apache, PHP, and review configuration for ensuring our application not only functions well but leverages URL rewriting and how to serve multiple applications.
Apache is an open-source HTTP server launched in 1995 and has been the most popular web server on the internet since 1996. My earliest experience with Apache goes back to 1998 with PHP and Perl Common Gateway Interface applications on Debian and Red Hat Linux distributions. The ability to build your web server on the internet in 1998 felt incredibly empowering. These days of static sites being hosted in S3 storage buckets or being hosted by the hot new startup it’s easy for developers to forget about the webserver.
We’ll be using Ubuntu 20.04 for our examples but Apache runs on just about every Linux distribution you’d like to use. These examples will hold in Ubuntu-like distributions but always refer to the documentation of your distribution. In Red Hat, Centos, and similar the Apache package is named httpd, however, the configuration options will be the same.
Installing Apache and PHP using apt on Ubuntu will install and configure nearly all of the required parts to wire PHP to apache, which is done via the libapache2-mod-php package giving Apache the ability to run our PHP applications.
sudo apt install apache2 php libapache2-mod-php php-xml
## Configuration and Directives
Apache is configured by plain text directives placed in a specific folder structure. The primary configuration file is apache2.conf. The rest of the configuration files ports.conf, and files in conf-enabled, mods-enabled, and sites-enabled are all combined as the Apache configuration combining what ports to listen on, generic statements or snippets, then what server mods have been enabled, and finally configuration what HTTP services are running and listening on specific devices, or virtual hosts. Virtual hosts are how you tell Apache how to run our application.
PHP configuration is where you would expect it on a Debian derivative located at /etc/php/. The PHP configuration for Apache will be in the folder /etc/php/7.4/apache2/php.ini. This folder structure follows a similar pattern for each version of PHP we install.
On Ubuntu systems we’ll see the contents of /etc/apache2 where our virtual hosts will be placed in sites-available we can selectively enable specific sites using the a2ensite command which will create a symbolic link from /etc/apache/sites-available/our-virtualhost.conf to /etc/apache/sites-enabled/our-virutalhost.conf which allows us to easily turn sites on or off by enabling or disabling them. The ability to toggle sites on and off is immensely helpful when experimenting with configuration options for a specific site since it is easier to isolate the running configuration by turning off sites or other configuration options you may not need.
/etc/apache2# tree -L 1 .
├── apache2.conf
├── conf-available
├── conf-enabled
├── envvars
├── magic
├── mods-available
├── mods-enabled
├── ports.conf
├── sites-available
└── sites-enabled
We’re going to leave most of apache2.conf as the defaults. If you want to adjust the log formatting of Apaches log you can find the LogFormat definitions here, as well as where the logs are stored as well as the global values for KeepAliveTimeout (Seconds to wait for another request from the same client on the same connection) as well as the Linux user and group Apache runs as (www-data by default). While the apache2.conf looks extensive it’s a bit less daunting if you take a look at the default configuration without the large comment blocks
DefaultRuntimeDir ${APACHE_RUN_DIR}
PidFile ${APACHE_PID_FILE}
Timeout 300
KeepAlive On
MaxKeepAliveRequests 100
KeepAliveTimeout 5
User ${APACHE_RUN_USER}
Group ${APACHE_RUN_GROUP}
HostnameLookups Off
ErrorLog ${APACHE_LOG_DIR}/error.log
LogLevel warn
IncludeOptional mods-enabled/*.load
IncludeOptional mods-enabled/*.conf
Include ports.conf

<Directory />
    Options FollowSymLinks
    AllowOverride None
    Require all denied
</Directory>

<Directory /usr/share>
    AllowOverride None
    Require all granted
</Directory>

<Directory /var/www/>
    Options Indexes FollowSymLinks
    AllowOverride None
    Require all granted
</Directory>

AccessFileName .htaccess
<FilesMatch "^\.ht">
    Require all denied
</FilesMatch>

LogFormat "%v:%p %h %l %u %t \"%r\" %>s %O \"%{Referer}i\" \"%{User-Agent}i\"" vhost_combined
LogFormat "%h %l %u %t \"%r\" %>s %O \"%{Referer}i\" \"%{User-Agent}i\"" combined
LogFormat "%h %l %u %t \"%r\" %>s %O" common
LogFormat "%{Referer}i -> %U" referer
LogFormat "%{User-agent}i" agent
IncludeOptional conf-enabled/*.conf
IncludeOptional sites-enabled/*.conf
## Default Host Configuration
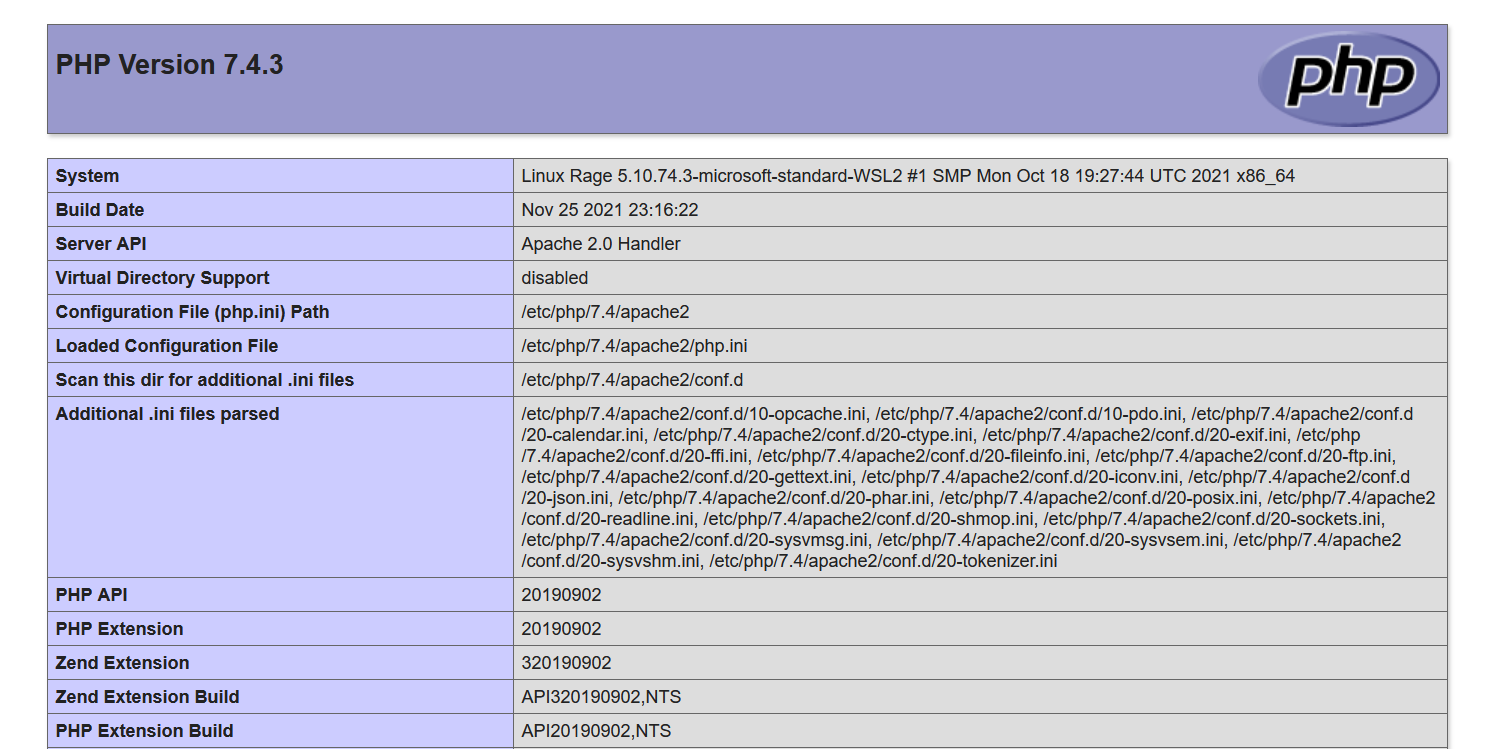
We can see there are two sites-enabled by default 000-default.conf and default-ssl.conf, together these files contain the directives to serve a basic site from the path /var/www/html. The virtual host configurations will inherit the entire Apache configuration by default. Virtual hosts are specific configurations for websites and applications to be served from Apache. We can use sudo vim /var/www/html/info.php to create a new PHP file and paste <? phpinfo();. Saving the file (:wq) and visiting http://localhost/info.php shows you something similar to the PHP Version 7.4.3 info page.
While PHP 7.4 is a fine release in 2021 it’s somewhat old. We should use Ondřej Surý’s Private Package Archive (PPA) to install more recent versions of PHP. To add the PPA we’ll run sudo add-apt-repository ppa:ondrej/php which adds Ondřej’s repository on our system. To install PHP 8.1 in our current configuration we can run sudo apt install -y libapache2-mod-php8.1 php8.1-xml . With our new PHP version enabled we can use sudo a2dismod php7.4 to disable PHP 7.4 from Apache and use sudo a2enmod php8.1 to enable PHP 8.1 for use with Apache. To apply our PHP version changes run sudo service apache2 restart and we can refresh our http://localhost/info.php browser window to see we’re now running PHP 8.1.0. An important note: we’re leveraging mod_php which is an Apache module to run PHP; this means we can only have one PHP version running at a time. To run multiple versions of PHP with Apache we’d want to install and configure PHP-FPM, which we’ll cover in a future installment. Using mod_php we’re wrapping PHP inside Apache, FPM for example is an external (to Apache) service which is connected typically via sockets or TCP.
To create a self signed SSL certificate for our local development site we can use sudo openssl req -x509 -nodes -days 365 -newkey rsa:2048 -keyout /etc/ssl/private/apache-selfsigned.key -out /etc/ssl/certs/apache-selfsigned.crt. For usage across networks (IE once you’re not on your local machine) you’ll want to use Let’s Encrypt to create functional SSL certificates that will be trusted by browsers because they’re signed by a proper Certificate Authority, unlike our self-signed certificate.
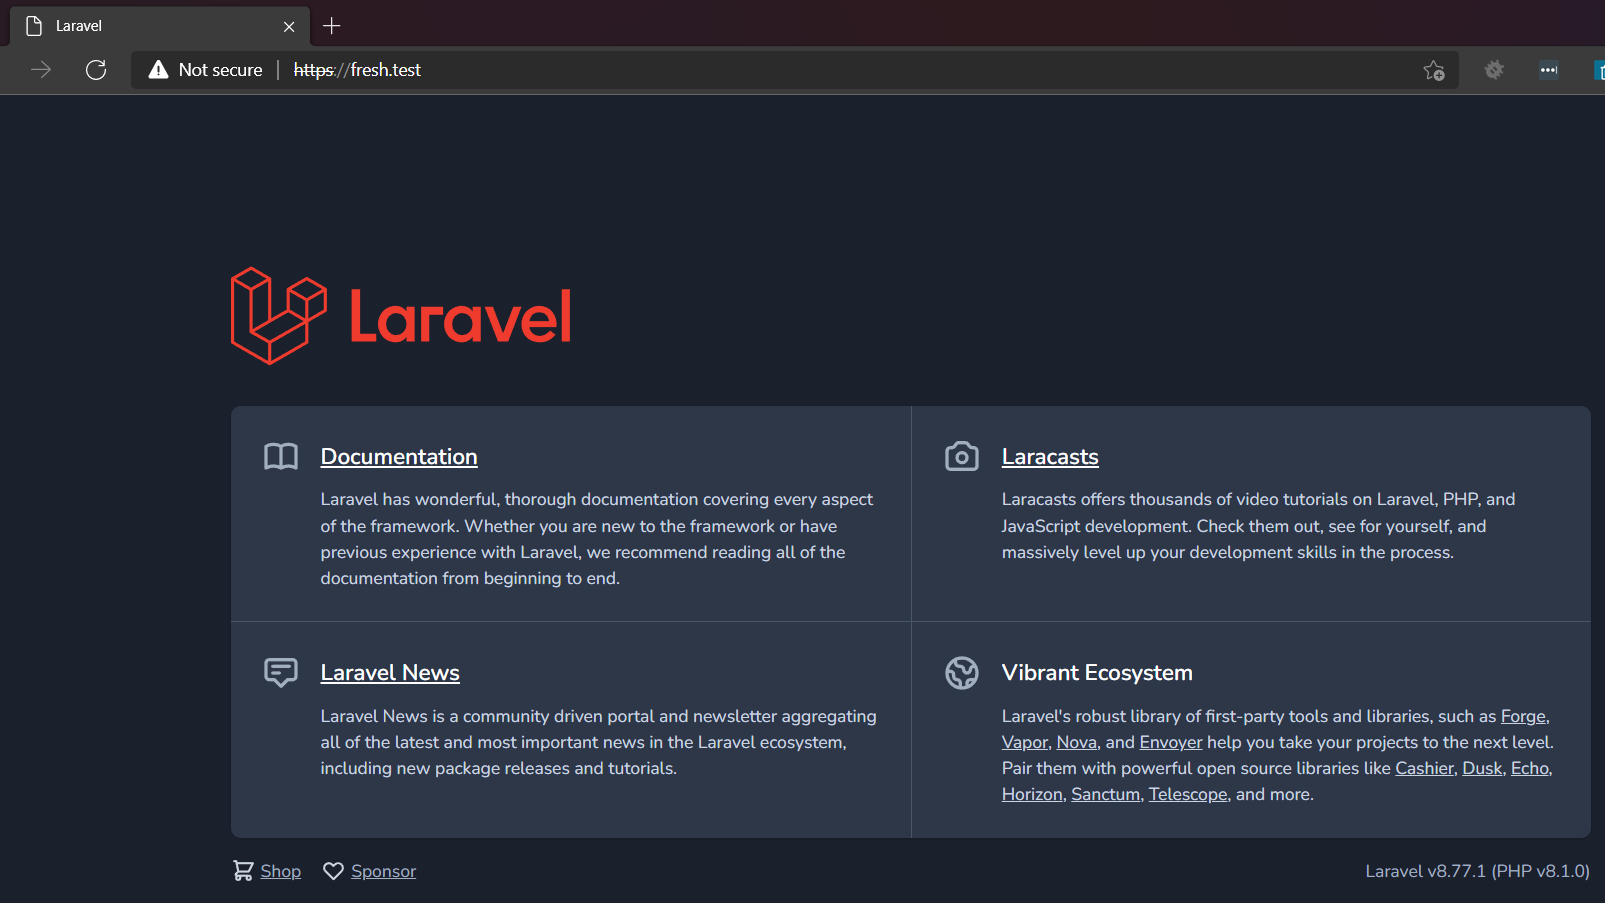
Now with a fresh PHP 8.1 working with Apache, we’re ready to create our first virtual host which will serve as our development environment for our project. We’ll create a fresh application located at /var/www/fresh and use sudo chown -R www-data:www-data /var/www/fresh to ensure our www-data user owns the files and will be able to run them via Apache. Create a new file at /etc/apache2/sites-available/fresh.test.conf containing the Virtual host directives:
<VirtualHost *:80>
    ServerName fresh.test
    DocumentRoot /var/www/fresh/public
    ErrorLog ${APACHE_LOG_DIR}/fresh-error.log
    CustomLog ${APACHE_LOG_DIR}/fresh-access.log combined
</VirtualHost>
<VirtualHost *:443>
    ServerName fresh.test
    DocumentRoot /var/www/fresh/public
    SSLEngine on
    SSLCertificateFile /etc/ssl/certs/apache-selfsigned.crt
    SSLCertificateKeyFile /etc/ssl/private/apache-selfsigned.key
</VirtualHost>
Our fresh.test Virtual host will listen on any network address to port 80 for incoming requests: <VirtualHost *:80>. We’ll use ServerName fresh.test to instruct Apache to serve requests at our development URL. The DocumentRoot directive instructs Apache to use the path as the webroot so that fresh.test will be served from /var/www/fresh/public/ path. The next two log directives configure the ErrorLog to contain all site errors and a CustomLog to log all the requests accessed of this server. Once the server has sent the request to the PHP process the application’s logging configuration may utilize these same log locations but will often use their own such as storage/logs/laravel.log is the default for a Laravel application log location.
With our Virtual host configuration complete we need to enable our site with sudo a2ensite fresh.test.conf then reload Apache with sudo service apache2 reload. Before we test our configuration in the browser we need to ensure our system’s host file contains a mapping for our fresh.test domain since it’s not a real registered domain name. We’ll want to add 127.0.0.1 fresh.test to /etc/hosts on Linux, Unix, macOS systems while Windows users will find this file at C:\Windows\system32\drivers\etc\hosts.
Because we’re using a self-signed certificate web browsers may show warnings when we visit https://fresh.test such as Firefox’s "Firefox detected a potential security threat and did not continue to fresh.test” We know this is our development site so we can click “Advanced” and “Accept the Risk and Continue” to proceed to our site, which is now serving our fresh Laravel application.
Ultimately there is not much to Apache, when software has been around this long it’s reassuring to know the investment spent learning it is still useful today and carries over to all aspects of web development, not just PHP, the fundamentals Apache teaches us applies to every backend programming language whether it’s PHP, Ruby, or Python. The biggest thing I appreciate about the Ubuntu ecosystem is how numerous mundane tasks such as creating paths, shortcuts to configuration files, and auto wiring up PHP & Apache via mod_php is automatic where on Debian or Red Hat systems you will be responsible for creating and copying a lot of these files and configuration paths manually. Another benefit of Apache is that so much content exists on every level from complete new users to grizzled veterans there’s always something new to learn.
Thanks for joining a trip down memory lane and learning about the Apache and PHP basics. I hope you’re empowered to start hacking on your instances of Apache and exploring what the most popular web server on the internet has to offer. Next month we’ll be diving into FPM configuration and demonstrating how to use https://www.nginx.com to provide more secure and isolated applications.
Warning:
This post content may not be current, please double check the official documentation as needed.
This post may also be in an unedited form with grammatical or spelling mistakes, purchase the January 2022 issue from http://phparch.com for the professionally edited version.
As Seen On
Recent Posts
- PHP to Rust via Copilot
- Compiling Python 3.12 from Source Tarball on Linux
- HTML Form Processing with PHP - php[architect] Magazine August 2014
- The Workshop: Local Dev with Lando - php[architect] Magazine November 2022
- Getting back into the swing of things
- All Posts
Categories
- ansible
- apache
- applesilicon
- aws
- blackwidow
- cakephp
- community
- composer
- conferences
- copilot
- data-storage
- day-job
- devops
- docker
- fpv
- general
- github
- givecamp
- homestead
- jigsaw
- joindin
- keyboard
- laravel
- learning
- linux
- maker
- mamp
- mentoring
- music
- nonprofit
- opensource
- packages
- php
- phparch
- projects
- provisioning
- python
- razer
- rust
- s3
- security
- slimphp
- speaking
- static-sites
- storage
- testing
- tiny-whoop
- today-i-learned
- training
- ubuntu
- vagrant
- version-control
- windows
- writing
- wsl
- wsl2
- zend-zray