Building Homestead in 2022
Joe • January 9, 2022
vagrant homestead opensource applesiliconThere are two parts to the Homestead product: a base box named Laravel Settler and a run time Laravel Homestead. From the Settler repo, we’re able to build base boxes Homestead, Homestead-ARM, and Homestead-MariaDB.
What do you need?
You need Packer and a Virtualization provider. You can likely build Homestead base boxes for Virtualbox, Parallels, and sometimes Hyper-V and VMware. You'll want to clone laravel/settler and chef/bento to the same parent folder.
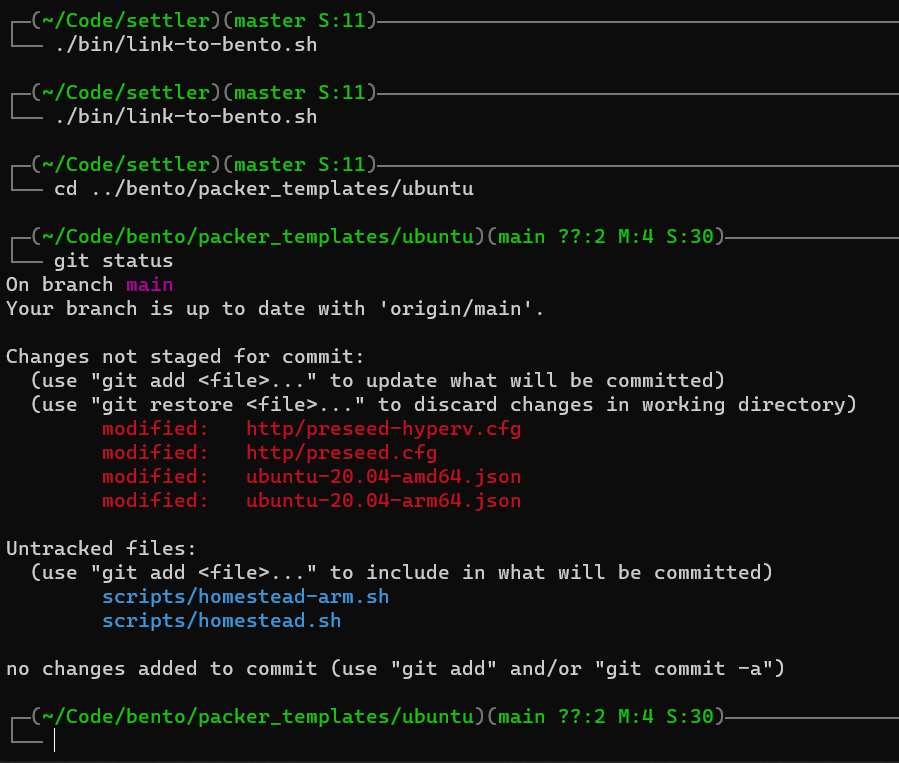
Prepare the repositories for a fresh build
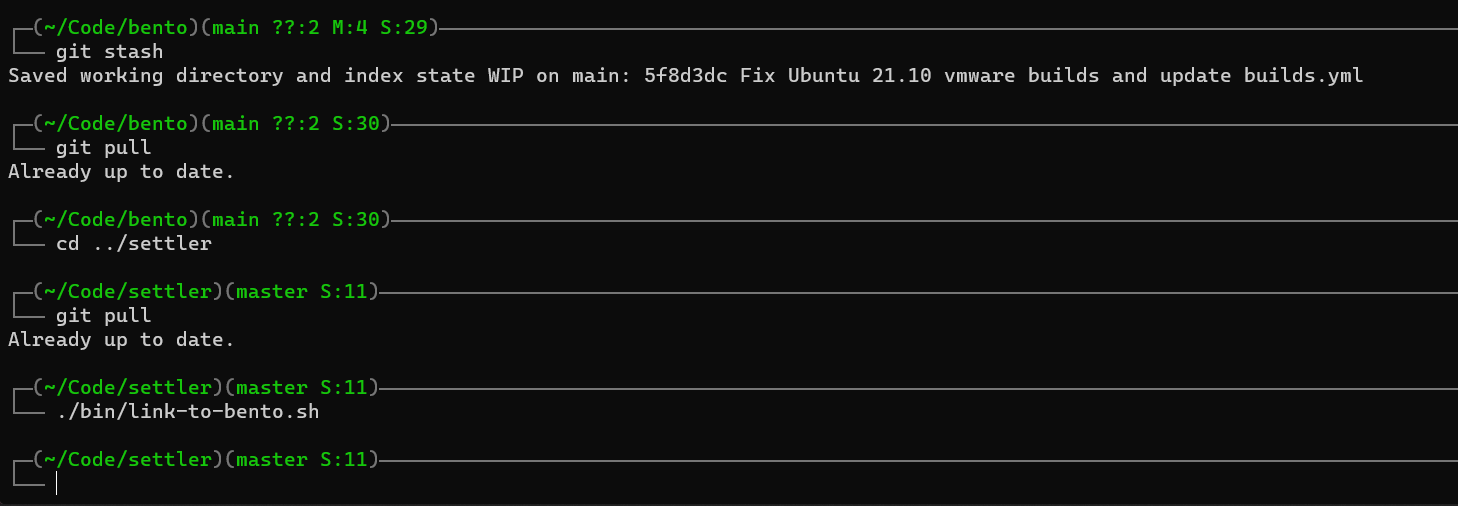
Commands to stash any changes and pull fresh copies of bento and settler repositories.
Always remember to reset your directories before beginning any new builds.
Configure the Settler Build
The first section of the scripts/amd64.sh or scripts/arm.sh scripts describes the base options. The script is broken into sections of PHP, MySQL, MariaDB, and PostgreSQL. By default, we install each except MariaDB as our configuration specifies. We also get a debug output at the start of our run so we can see what our configured options were. Change these options to your desired state or continue with the defaults.
#!/usr/bin/env bash
export DEBIAN_FRONTEND=noninteractive

ARCH=$(arch)

SKIP_PHP=false
SKIP_MYSQL=false
SKIP_MARIADB=true
SKIP_POSTGRESQL=false

echo "### Settler Build Configuration ###"
echo "ARCH             = ${ARCH}"
echo "SKIP_PHP         = ${SKIP_PHP}"
echo "SKIP_MYSQL       = ${SKIP_MYSQL}"
echo "SKIP_MARIADB     = ${SKIP_MARIADB}"
echo "SKIP_POSTGRESQL  = ${SKIP_POSTGRESQL}"
echo "### Settler Build Configuration ###"
Link the Settler Build Script
Run ./bin/link-to-bento.sh (Linux, macOS) or ./link-to-bento.ps1 (Windows) to create links into the bento repository.
Linking the settler build scripts to bento repository.
Run packer build...
An example to build for VirtualBox would be:
$ packer build --only=virtualbox-iso ubuntu-20.04-amd64.json
If this is your first time experimenting with packer you will likely want to use --on-error=abort so that the virtual machine is left running if an error is raised so you can inspect the running machine state. By default, the virtual machine will always be cleaned up (deleted). The full help on the flag is on-error=[cleanup|abort|ask|run-cleanup-provisioner] If the build fails do: clean up (default), abort, ask, or run-cleanup-provisioner.
An example to build VirtualBox and Parallels would be:
$ packer build --only-virtualbox-iso,parallels-iso ubuntu-20.04-amd64.json
An example to build Hyper-V and VMware would be:
$ packer build --only-hyperv-iso,vmware-iso ubuntu-20.04-amd64.json
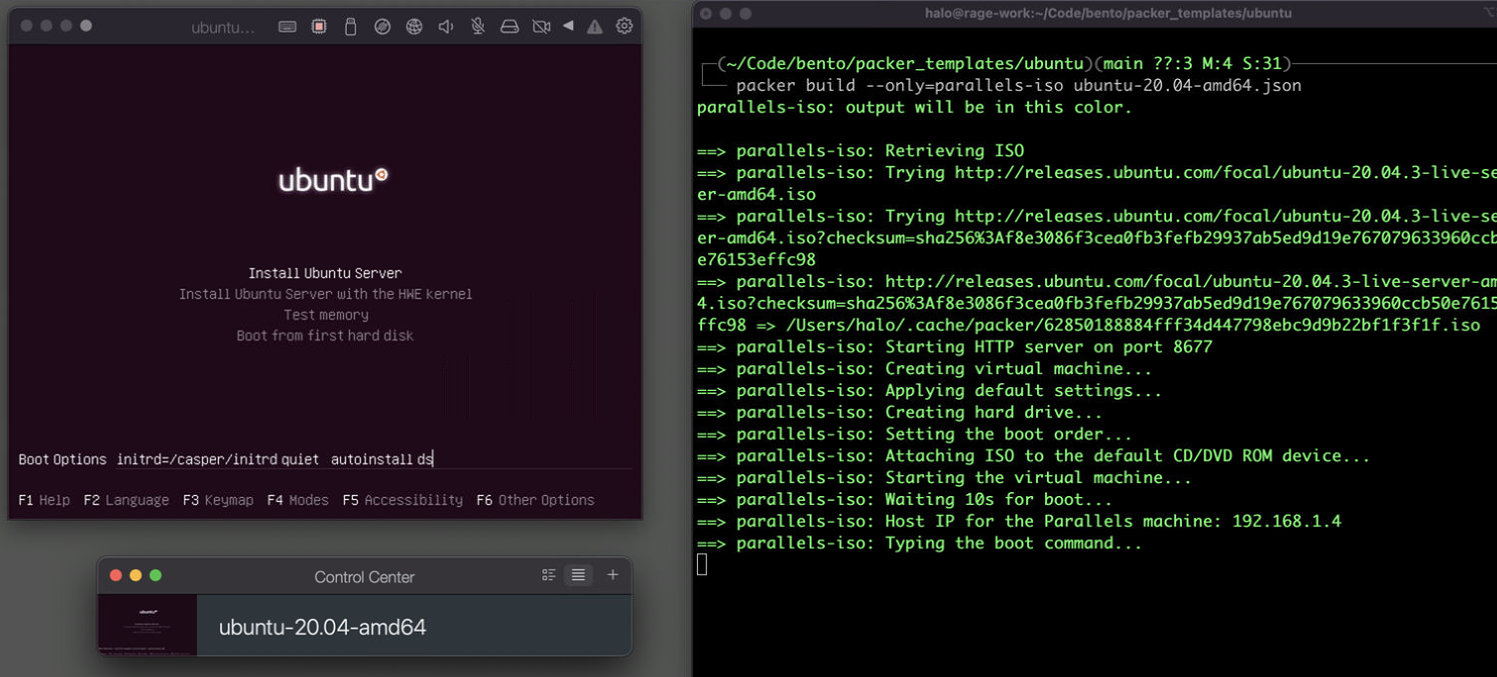
To build homestead-arm for Apple Silicon:
$packer build --only=parallels-iso ubuntu-20.04-arm64.json
Once the build begins you will be able to view the GUI and see the initial boot process happen.

Testing the build
Once you have completed a build you can add the box to Vagrant via vagrant box add teststead ../../builds/ubuntu-20.04.parallels.box. Edit your Homestead.yaml Configuration to override the box name:
box: teststead
SpeakFriendAndEnter: true
Running vagrant destroy -f && vagrant up will create a new Homestead instance using the base box teststead.
Sharing the Build
This next step should only be completed when you want to share your base box with the world. Ensure you do not put any secrets in the base box. Once you have the .box file built you’re free to share it as needed. To share it on https://app.vagrantup.com you’ll want to create a hash of the box file via shasum -a 512 ../../builds/ubuntu-20.04.parallels.box
$ shasum -a 512 ../../builds/ubuntu-20.04.parallels.box
4a422d5f9cf86f18ea29bcf94441cf530d4e007c08f7d358d0b25d2c655886bca899b817c31e381c75899769c11ac369bd12a91a4c7994930a9966127470a08b  ../../builds/ubuntu-20.04.parallels.box
Create a Vagrant box and the next step is to create a new version:
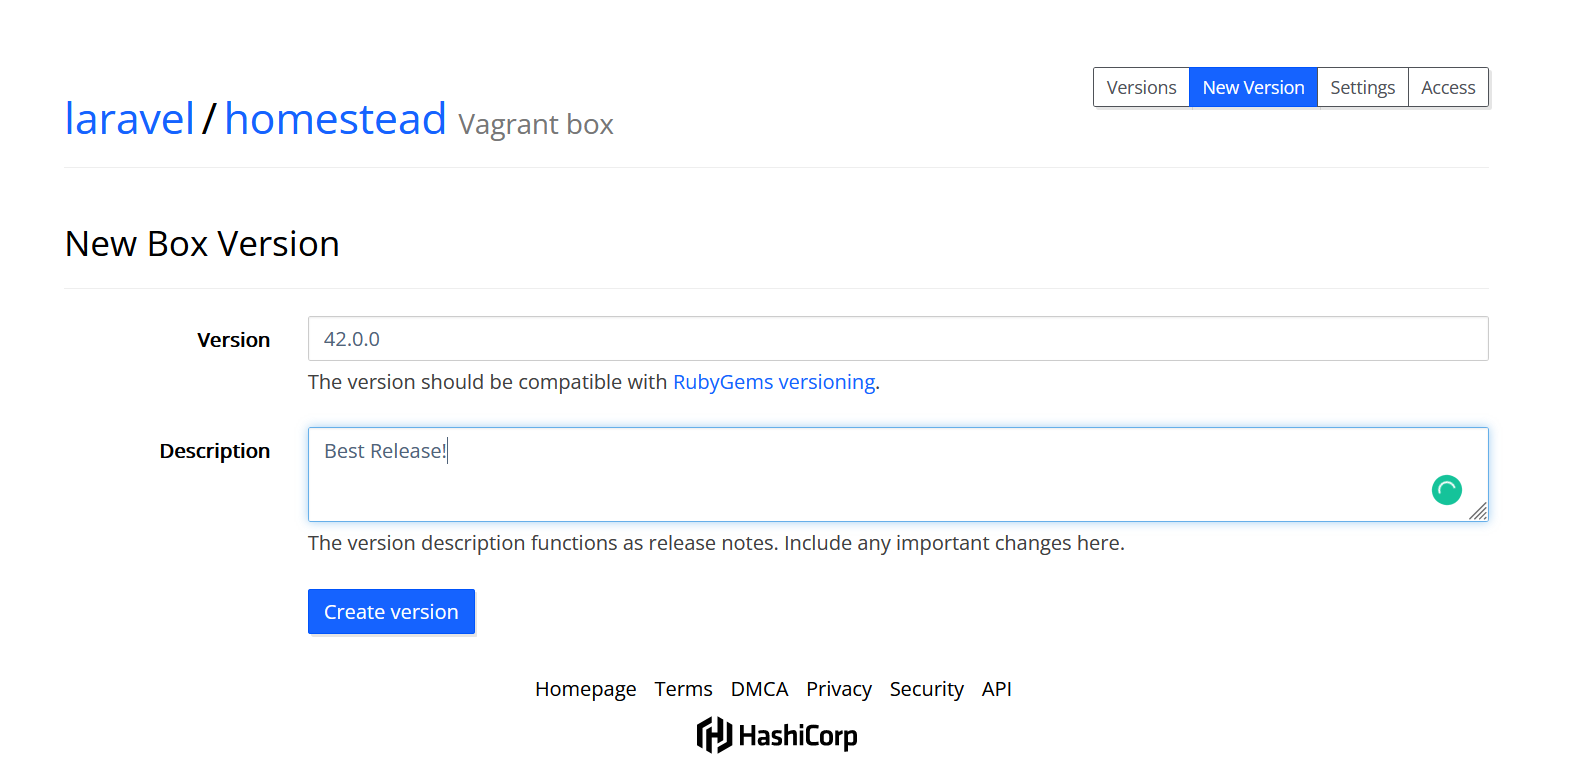
Next, we need to “Add a provider” and fill out the form for the box we’re planning on sharing.
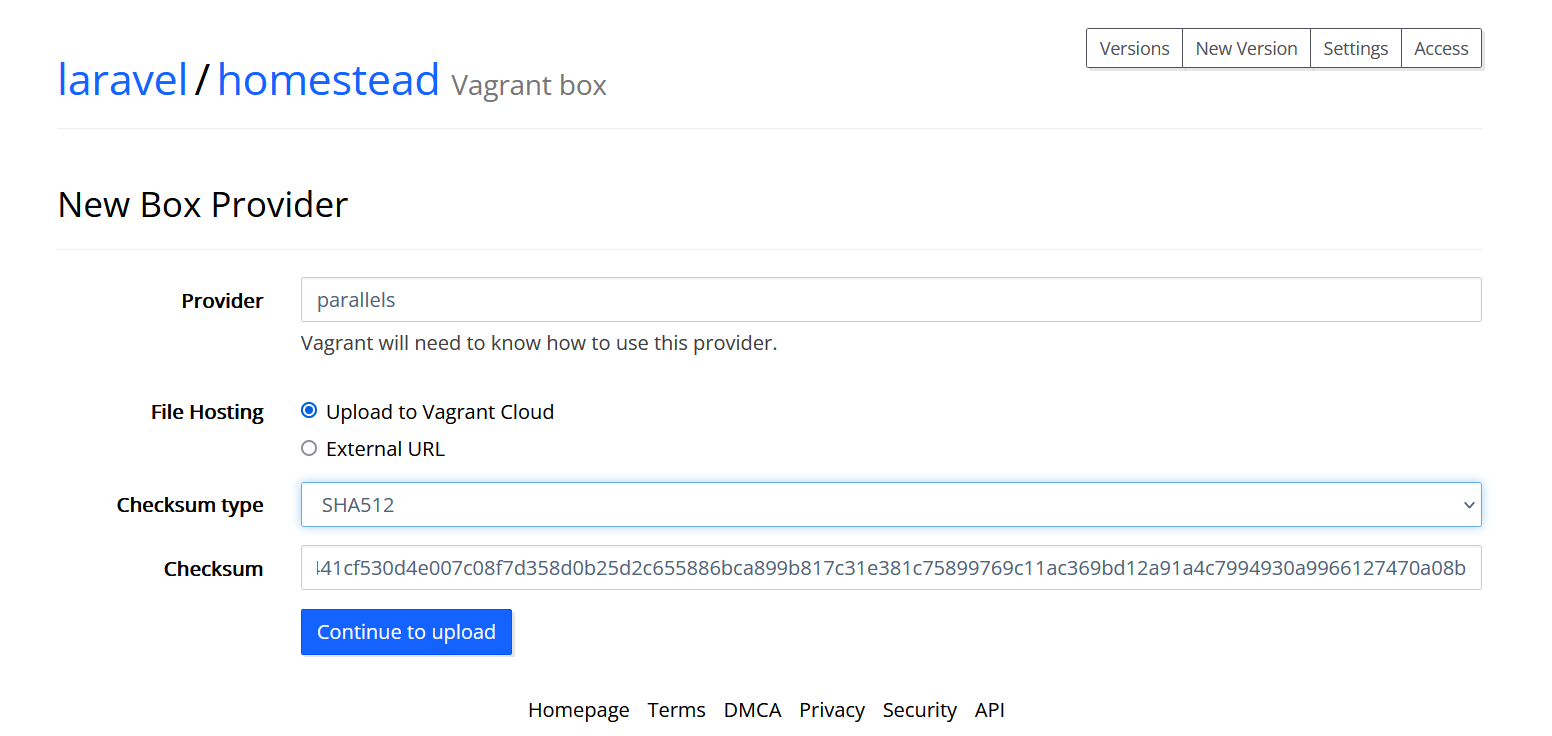
Clicking “Continue to Upload” takes us to a form where we can Browse to our .box file and select it to upload the file.
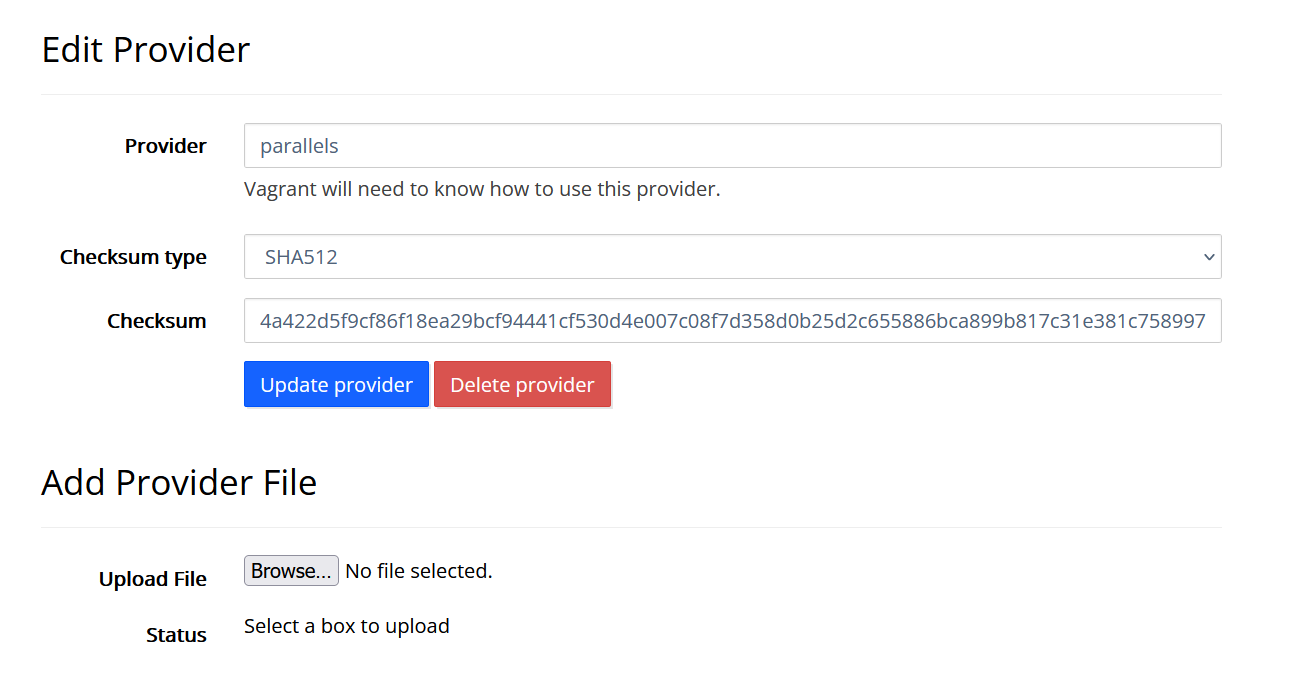
Once the upload completes the next step is to navigate back to your version and click the “Release” button to make your box public.
Happy base box building!
As Seen On
Recent Posts
- PHP to Rust via Copilot
- Compiling Python 3.12 from Source Tarball on Linux
- HTML Form Processing with PHP - php[architect] Magazine August 2014
- The Workshop: Local Dev with Lando - php[architect] Magazine November 2022
- Getting back into the swing of things
- All Posts
Categories
- ansible
- apache
- applesilicon
- aws
- blackwidow
- cakephp
- community
- composer
- conferences
- copilot
- data-storage
- day-job
- devops
- docker
- fpv
- general
- github
- givecamp
- homestead
- jigsaw
- joindin
- keyboard
- laravel
- learning
- linux
- maker
- mamp
- mentoring
- music
- nonprofit
- opensource
- packages
- php
- phparch
- projects
- provisioning
- python
- razer
- rust
- s3
- security
- slimphp
- speaking
- static-sites
- storage
- testing
- tiny-whoop
- today-i-learned
- training
- ubuntu
- vagrant
- version-control
- windows
- writing
- wsl
- wsl2
- zend-zray